
Today let’s look at the basics of configuring frameworks in EPBCS.
To recap, there are currently 4 frameworks that come out of the box with EPBCS when you enable the Enterprise application type:
- Financial Statement Planning (“Financials”)
- Workforce Planning (“Workforce”)
- Capital Asset Planning (“Capital”)
- Project Financial Planning (“Projects”)
Taken directly from the Oracle EPM cloud Enterprise Planning Cloud website:
- Financial Statement Planning will give customers the ability to plan and forecast revenue and expenses, as well as map to an Income Statement, Balance Sheet, and Cash Flow.
- Workforce Planning allows for compensation planning as well as strategic workforce planning.
- Capital Asset Planning allows customers to manage new capital investments and existing assets, as well as intangibles.
- Project Financial Planning allows for streamlined and detailed project planning, in addition to the ability to monitor project performance.
Each framework has it’s own set of pre-configured objects, including dimensions, forms, calculations, dashboards, navigation flows, etc. However, customers can also build in their own metadata and customize copies of the pre-configured components so that they’re not completely forced into using what comes out of the box. These frameworks can be ignored completely, enabled one at a time, all at the same time (but in queue), or several at a time (but in queue). This flexibility allows customers to choose what they want and when they want it.
So how do you enable and configure a framework? Within the Console card you’ll find a tab called “Configure” which is purpose built for enabling frameworks, adding on options, and maintaining other items necessary for frameworks. Configurations must occur after an application has been created, and they must be completed in queue.
Within the Configure area, you’ll notice that there’s a drop-down at the top where you can choose one of the 4 frameworks to enable. Highlight one and then press the Enable Features button at the bottom.

Each framework has its own set of configuration options. Here are the options for the Financials framework:


Note that I’m randomly picking options for the screenshots in this blog post without putting much thought into them. However, I did change the default Product dimension to a different name, “Project”. This would be important if you were planning to configure the Projects framework and wanted to reuse the Project dimension in your Financials planning process. It’s a good idea to learn all of the default dimensions up front so that you keep your names congruent throughout the application.
Most framework options do not require enablement up front – they can wait until later if you’re not sure. However, you can’t disable something that you’ve already enabled. So you’ll need to understand your options up front and decide carefully. Note that this area is for creating additional custom dimensions and/or renaming the default dimension names that come with the framework.
Due to the project I’m supporting, I’ve been playing with the Financials framework for weeks and have enabled this one at least a dozen times in the many iterations of the application I’ve created and blown away. I know that it takes 5-7 minutes to enable. I also know that if you don’t make sub-selections for each option up front, you can corrupt your application (and without warning). For instance, if I select the “Revenue/Gross Margin” option but then don’t select one of the categories, I won’t get an error. I can even choose to enable the framework without error. However, it won’t complete successfully. The application becomes unstable when the application doesn’t complete successfully multiple times. I hope Oracle puts in some better and proactive warnings for users. It seems like an easy feature that they can add to the interface.
Once you’ve fully enabled a framework, you should receive a successful notification. You are also asked to log out and log back in to see all of the new application features.
If you go back into the Application area within the Console card you’ll see a new cube called “OEP_FS” added to the list as a result of enabling the Financials framework:

This cube has a reserved name that cannot be changed. There are many reserved names within the frameworks, in fact. The name of each framework’s cube is important because many predefined framework member names (and other components) are prefixed with the same name. Since they’re all housed together, this is key for keeping it organized in your head.
Let’s pause now for a moment and take a deeper look into the Financials framework. I’ll do this for this framework (especially since I’m partial to this one), but then cover the 3 remaining frameworks at a high level.
When you go back into Configure and look at the Financials screen, here’s what you can configure now after the initial enablement:

If you want to go back and configure options that you didn’t enable the first time around, you would press the “Enable Features” button in the upper right-hand corner. Note that you can continually enable new features until you run out. However, there are objects that get created with each option (metadata, forms, etc.) that you’re not allowed to delete once they’re enabled. Since you can’t disable features, it’s better to be conservative up front.
The Configure area will become familiar to you as you will perform regular maintenance here (especially in “Planning and Forecast Preparation”). The Revenue Accounts, Expense Accounts, Entities, and Project options allow you to configure metadata. These screens are not to be confused with the dimension administration area, however, although they seem similar. For instance, here’s the Revenue Accounts window:

Here, you can see the predefined members for certain sections of the Account hierarchy and can change their aliases (but no other properties).
And here’s what that same cross-section of accounts looks like in the Account dimension administration area:

Continuing on with the detailed look, here’s an overview slide show of the predefined dimension members that were added to this cube. Some of the dimension members (e.g. Account) will change based on the framework options that I selected for enablement:
And here’s a slide show of the different Planning components that were generated upon enabling the Financials framework:
Next, let’s configure the Workforce framework:

Note that I’m choosing to configure these frameworks in the drop-down order. You can go in any order you want. However, there are some framework options that depend on the configuration of the other frameworks. Therefore, you can save some time by following the drop-down sequence. Here are the options for the Workforce framework:

This framework took over 8 minutes to enable. After enablement, I can see 3 new cubes (plus many other components) added to the application:

Next, let’s enable the Capital framework:

Here are the options for this one:

This one took almost 9 minutes to configure. One new cube was added to the application list:

Finally, let’s configure the last framework, Projects:

Here are the options for this framework:


This one took over 15 minutes to configure. It’s taking longer and longer to configure each new framework.
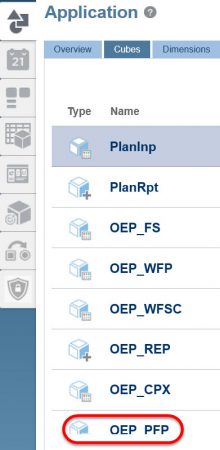
When I’m done enabling all 4 frameworks, here is what my final cube list looks like with the new cube for Projects added:
In the end, it took me over 45 minutes to enable all 4 frameworks. I would expect this process to take more time in the real world, as each option would be evaluated in detail first.
Tomorrow we’ll examine the concept of rolling forecasts in EPBCS.

Can you create a custom plan-type in addition to the OOB plan types?
LikeLike
Yes, you can. Even if all frame works are enabled, you should be able to create up to 2 BSO and 2 ASO plan types – at least that was the case the last time I tested this in summer.
LikeLiked by 1 person
Which cube should you use for Financials the Planlnp you created or the OEP_FS ? Do you use your created cube for the default cube for accounts, data forms etc or the delivered OEP_FS. Thanks .
LikeLike
I’m not sure I fully understand the question. EPBCS has the flexibility to use both the out of the box frameworks or your own custom plan types. It depends on which architecture design you’re going for. If you intend to use the out of the box framework for Financials then your design would primarily use OEP_FS, which is what it is tied to. The out of the box objects (forms, calculations, etc.) are also integrated with this cube.
LikeLike
Ok. I am just confused why you created another plan type and what it could be used for? So if i wanted to utilize the business process, i should make sure that i use OEP_FS. Also how do you link the reporting cubes with either plan type?Thanks for your feedback.
LikeLike
Ah, I see. The creation of those other cubes was a forced option back when I wrote this post. The initial application creation required at least two cubes be created immediately, regardless if they were going to be used: 1 BSO and 1 ASO. Now, depending on which application type you create in EPBCS only one reporting cube (ASO) must be generated at application creation time or two (both BSO and ASO). Human Capital types required one. Finance types require two.
When you enable and configure any framework, the cubes tied to those will be auto-generated behind the scenes. You can tie the data flow between cubes using data management, XRef, data maps, etc. – there are multiple options for moving data between them.
Thank you for asking the question! I can see why that screenshot would be confusing.
LikeLike
What is the use and functionality of the Property dimension in Workforce?
LikeLike
It’s a dimension that is mainly used for calculations and is a key for data seeding to drive calculations. It is recommended not to be modified. Examples of members: taxable compensation, gross earnings, etc.
LikeLike
Do you know what are the “location aliases” for each predefined cube? (Financials, Capital Expenditure, Human Resources, etc.)
Thanks in advance.
LikeLike
You can see them from Calculation Manager | Actions | Database Properties | (right click any cube) | Location Aliases. The entire list will show and note that you will not be able to rename them. You can even export the list.
LikeLike