
In the October 2017 release of EPM Cloud, Oracle added a new feature to EPRCS that allowed customers to directly migrate FR reports to EPRCS MR (management reporting):

As full parity does not exist yet between FR and MR, Oracle warns that not all features will be available to migrate. “Near” full parity is expected by the end of this calendar year, 2019. I say “near” because in my discussions with Oracle, not every feature will make it over to MR – they are aiming for the most requested features.
So, how well does the import process work? After originally testing the feature at the end of 2017, I decided to give it a rest and let it catch up a bit on parity and defect fixing. Now that we’re at the beginning of 2019 and customers are using this feature pretty readily on our projects, it’s time to revisit what the process is and how well it works.
Let’s walk through the import process.
Step One: Export the FR files from FR
This can happen from on-prem FR or EPM Cloud FR. You’ll want to navigate to the Explore Repository. Initiate the export process by navigating to File >> Export.

Then highlight the reports you wish to export. You can select one (which will export a .des file) or multiple (which will export a .zip file). You’ll be prompted to save them to your local computer:

Step Two: Import the FR files into EPRCS
Now, navigate to your EPRCS environment. You’ll want to go to Library >> Reports -or- the specific library folder where you wish to import the reports:

In the right-hand window where the reports are listed, click the Actions cog wheel icon and select Import:

Browse to the local exported FR file, carefully select your import location (this step is important if you don’t want to lose track of where your import went!), and then carefully choose your import options:

Next, press OK and then OK again at the information message:

The import process runs in the background by default. It’s actually pretty quick and has run in just under a minute most of the time for me. The user you’re logged in as will receive an email when the import is complete:
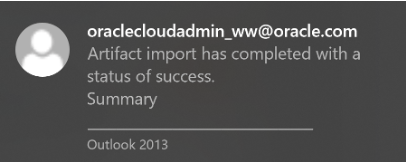
If you don’t want to wait for the email, use the Actions cog wheel to Refresh the screen every 5-10 seconds instead.
Step Three: Change the Migrated Report’s Data Source
If the original FR report’s data source connection name has changed in the Cloud, you’ll need to complete this step. Side note: it’s assumed that you’ve already created the appropriate data source connections in EPRCS prior to this step.
Luckily, you can change either a single report’s or multiple reports’ data sources at once. You may have to change several data sources on a single report depending on how many were used in the original FR report.
To change the data source, highlight the report(s) that you wish to change, then either select the Actions cog wheel in the right-hand window (if you’ve highlighted multiple reports), or select the Actions menu for the individual report (if you’ve only selected one). Select to Change Data Source, and note that you can do either a single report data source change using the report’s Actions menu:

or a multiple report data source change using the pane’s Actions cog wheel icon:

A new window will open, asking you what to change the data source to (note that it will select from the pre-existing list of EPRCS MR data source connections, so it’s assumed that you’ve already complete that setup):

Step Four: Open the Migrated Report and Fix the Errors
Now you’re done! Just kidding! You didn’t think you’d get off that easy, did you?
It’s expected that if you have any kind of complicated report that you will experience errors right after the migration process. Errors are indicated by a list of descriptions with ugly red X’s next to them, as well as a solid red line at the top of the MR report:

Some important things to note at this stage:
- No one will be able to run the MR report until all errors are fixed
- Sometimes it’s faster to hack the underlying FR .des file rather than trying to fix errors manually in EPRCS MR (more on that in a later blog post)
- The nice blue circles with i’s in them are informational messages – it’s not required that you fix these (although it might be better in the long run…but, priorities!)
Read the errors carefully. This is the hard part. Fix them either manually in the newly migrated report, or hack the underlying FR .des file (again, more on that in a future blog post) and then re-import it to recheck the errors.
Fix all errors before proceeding.
Step Five: Fix the MR Run-time Errors
And again, you didn’t think you’d get off that easy, did you? Even after you fix the red errors, you may still get more errors when you go to run the MR report:
 So, run the report.
See what you get.
Read and fix errors carefully.
Repeat until all errors are gone.
Step Six: Validate the MR Report
Now that all errors are gone, it’s time to validate the MR report. If you’re lucky enough to have the same application and data set in both the source and target system, then run both the original FR report and migrated MR report side by side in two screens to spot check the data and validate any report calculations. You may also want to make it a point to pause and ensure that the formatting (font, font size, object alignment, etc.) came over correctly.
Step Seven: A Small Tweak with Fonts
If you want your fonts to look just a smidge better (is smidge a word?), I would highly recommend that you upload any fonts you’re using to the Fonts folder in the library. In addition, if there are any custom fonts that your company uses that MR doesn’t support, you will have to upload them here in order for MR to recognize them.

However, lets be clear on font licensing. Most customers that I know don’t license fonts that are easily sourced from Microsoft Office products (although they do for custom fonts that are created for their company’s branding purposes). So, although uploading fonts is the best way to guarantee that EPRCS renders report fonts correctly, if you want to be in full compliance, you will need a license for any fonts uploaded. (Note that this actually applies to FR as well.)
Step Eight: Don’t Forget about EPRCS Security
If you’ve had to rehaul security in the Cloud, you will probably have to rehaul reporting security, too. Some important notes here:
- Data security is a pass through from the source system. In order for this to work properly, users need the exact same username in both EPRCS and the source system. This is a good reason why SSO should be implemented.
- Users need a minimum of the EPRCS user role
- Users should be grouped through the creation of EPRCS security groups in Access Control
- MR reports should also be grouped through folders in the EPRCS library
- Once security groups and folders have been created, assign group security View access at the folder level and it will inherit by default to the reports in that folder. You’ll do this through the folder’s Inspect menu.
Common FR to MR Migration Errors
I’ve now seen errors at 3 different customer instances, and they’re all over the place. Some of the rules in MR are different than FR.
For instance:
- MR does several integrity checks. For instance, it doesn’t like when there are formulas referencing blank formula cells or blank text cells. It also doesn’t like it when formulas are not valid. You could get away with some of these things in FR, but you can’t in MR. MR = better report integrity. Example error message:

- MR really doesn’t like it when your objects are floating off the designated report area. The first set of errors you might see may ask to resize those objects. You just need to grab that object’s outline and resize it so that it fits back onto the report. Example error message:

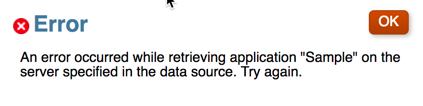
- If you forgot to change one of the data source connections initially after the report migration, you’ll get an error. Example error message:
That’s enough for now. In the next post, I’ll cover the key technical differences between FR and EPRCS MR.

One thought on “EPRCS Series: Migrating from FR to MR”